> ## Documentation Index
> Fetch the complete documentation index at: https://www.carstoragesoftware.com/docs/llms.txt
> Use this file to discover all available pages before exploring further.
# Browse the Integrations catalog
> Find HubSpot, Shopmonkey, the API, MCP, QR codes, and accounting tools in one Settings page, then open the right card to finish setup.
The Integrations page is the list of extra tools you can connect to Car Storage Software. Each tool has a card. You search, open a card to read what it does, then finish setup in the same window.
Use this guide the first time you want HubSpot, Shopmonkey, a website data feed, AI agents (MCP), printed QR codes, cameras, your own website address, or QuickBooks / Xero.
## What you will accomplish
* Open [Settings > Integrations](https://www.carstoragesoftware.com/dashboard/settings/integrations).
* Search the catalog and read what each card does before you turn anything on.
* Understand the **Off**, **On**, and **Connected** labels on each card.
* Know why QuickBooks and Xero stay locked until payments are set up.
## When to use this page
Open Integrations when you already use another tool for sales, shop jobs, or bookkeeping, and you do not want to type the same customer or invoice twice.
You can skip this page on day one if you only need cars, contacts, and the calendar. Come back when you are ready to connect another system.
## Before you start
* Sign in as a team admin, or ask an admin to open Integrations with you.
* Know which outside tool you want: HubSpot, Shopmonkey, QuickBooks, Xero, a website feed, or Claude.
* For QuickBooks or Xero, finish [Connect payment processing](/docs/settings/connect-payment-processing) first.
## Open Integrations
From the [Dashboard](https://www.carstoragesoftware.com/dashboard), click **Settings** in the left menu. On a small screen, open the menu first.
In the Settings list, click **Integrations**.
Direct link: [Settings > Integrations](https://www.carstoragesoftware.com/dashboard/settings/integrations).
**Expected result:** The page title is **Integrations**. Under **Available integrations** you see a search box and a grid of cards.
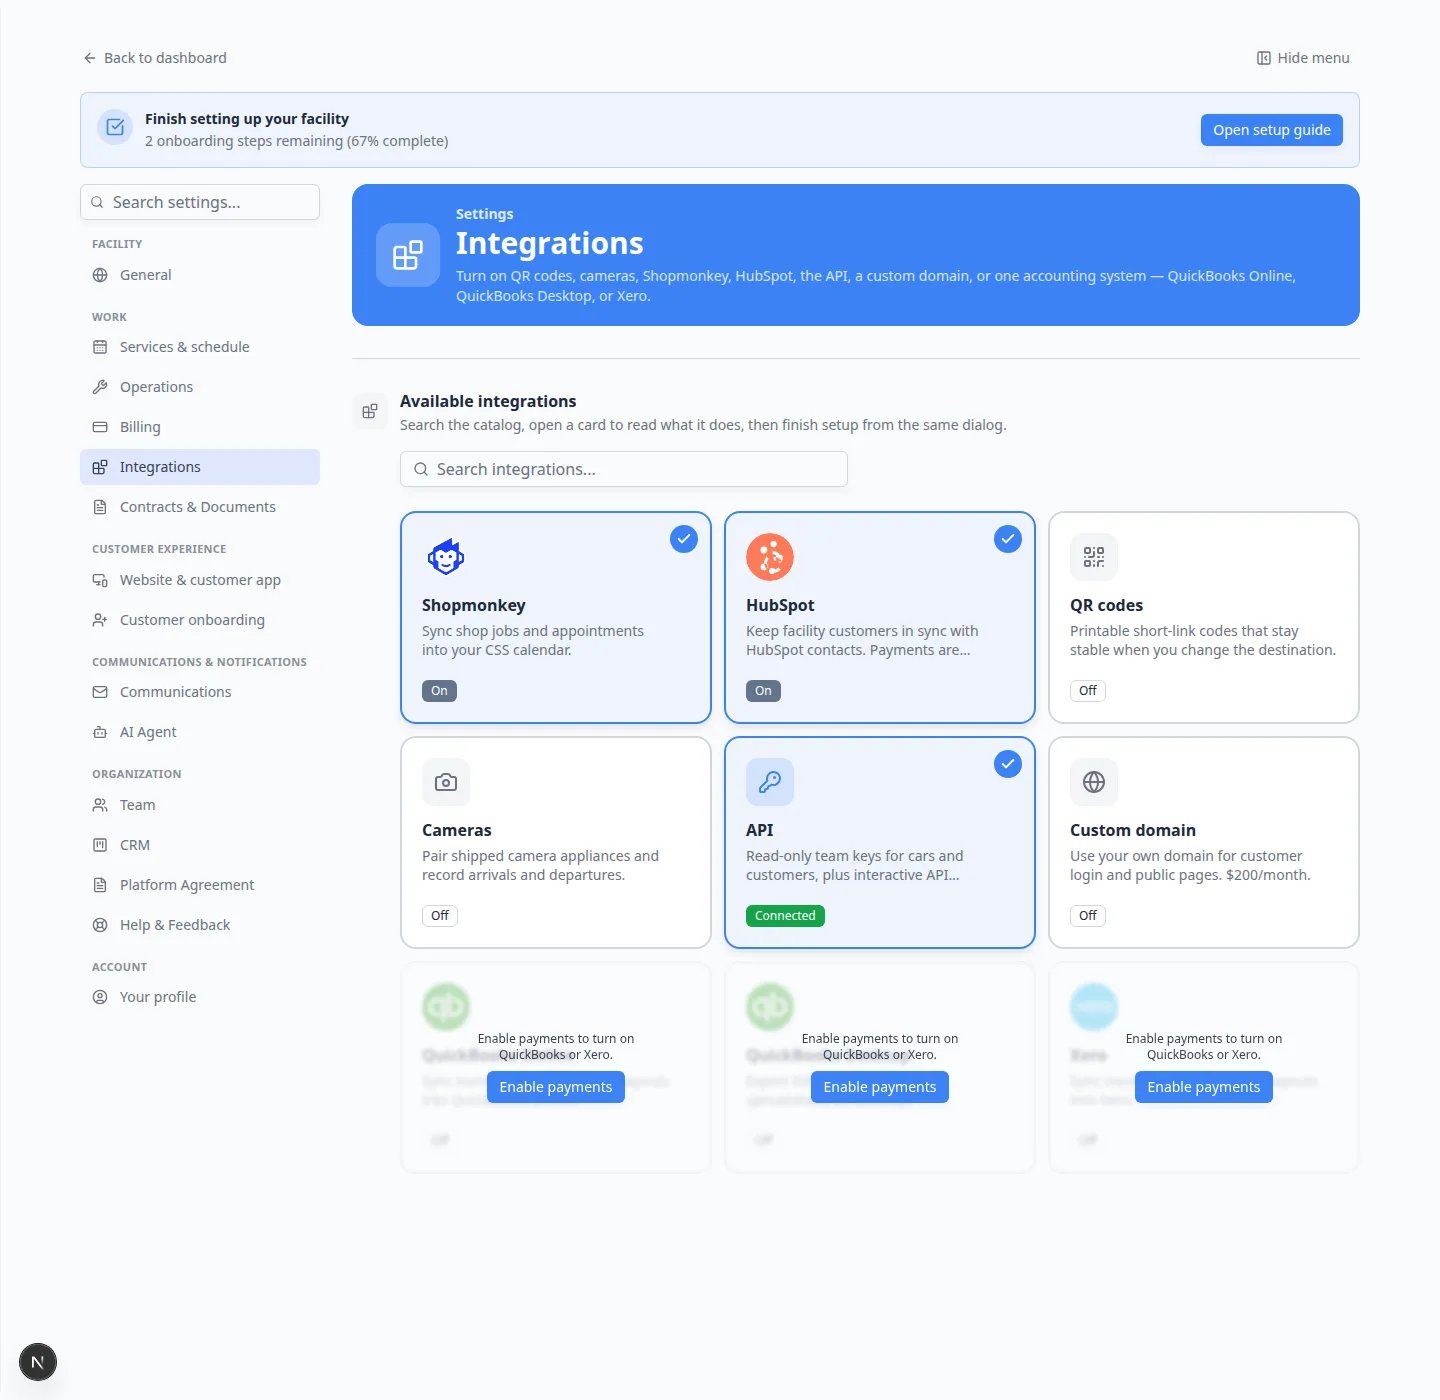 *[Settings > Integrations](https://www.carstoragesoftware.com/dashboard/settings/integrations) lists every extra tool in one catalog. Cards show Off, On, or Connected.*
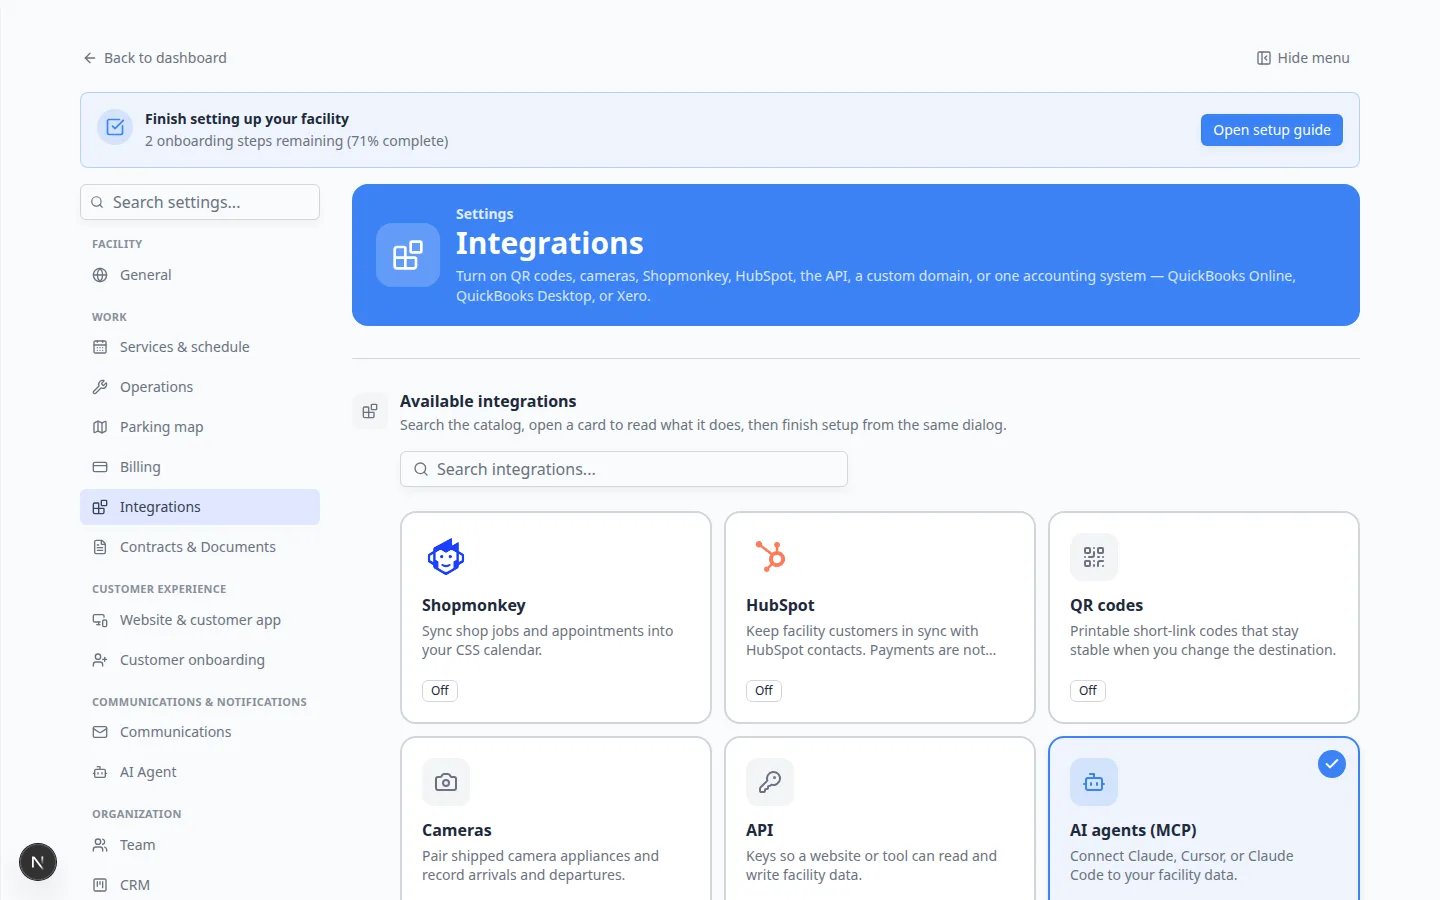 *The **AI agents (MCP)** card is in the same grid as Shopmonkey, HubSpot, and the API. A check mark means you turned it on. You still copy the **Connector URL** and sign in from Claude.*
## Search for a tool
At the top of **Available integrations**, click the box that says **Search integrations...**
Type a word such as **hubspot**, **shopmonkey**, **quickbooks**, **api**, or **mcp**.
**Expected result:** Only matching cards stay on the page. If nothing matches, you see “No integrations match” plus the words you typed.
Delete the text in the search box to see the full list again.
*The **AI agents (MCP)** card is in the same grid as Shopmonkey, HubSpot, and the API. A check mark means you turned it on. You still copy the **Connector URL** and sign in from Claude.*
## Search for a tool
At the top of **Available integrations**, click the box that says **Search integrations...**
Type a word such as **hubspot**, **shopmonkey**, **quickbooks**, **api**, or **mcp**.
**Expected result:** Only matching cards stay on the page. If nothing matches, you see “No integrations match” plus the words you typed.
Delete the text in the search box to see the full list again.
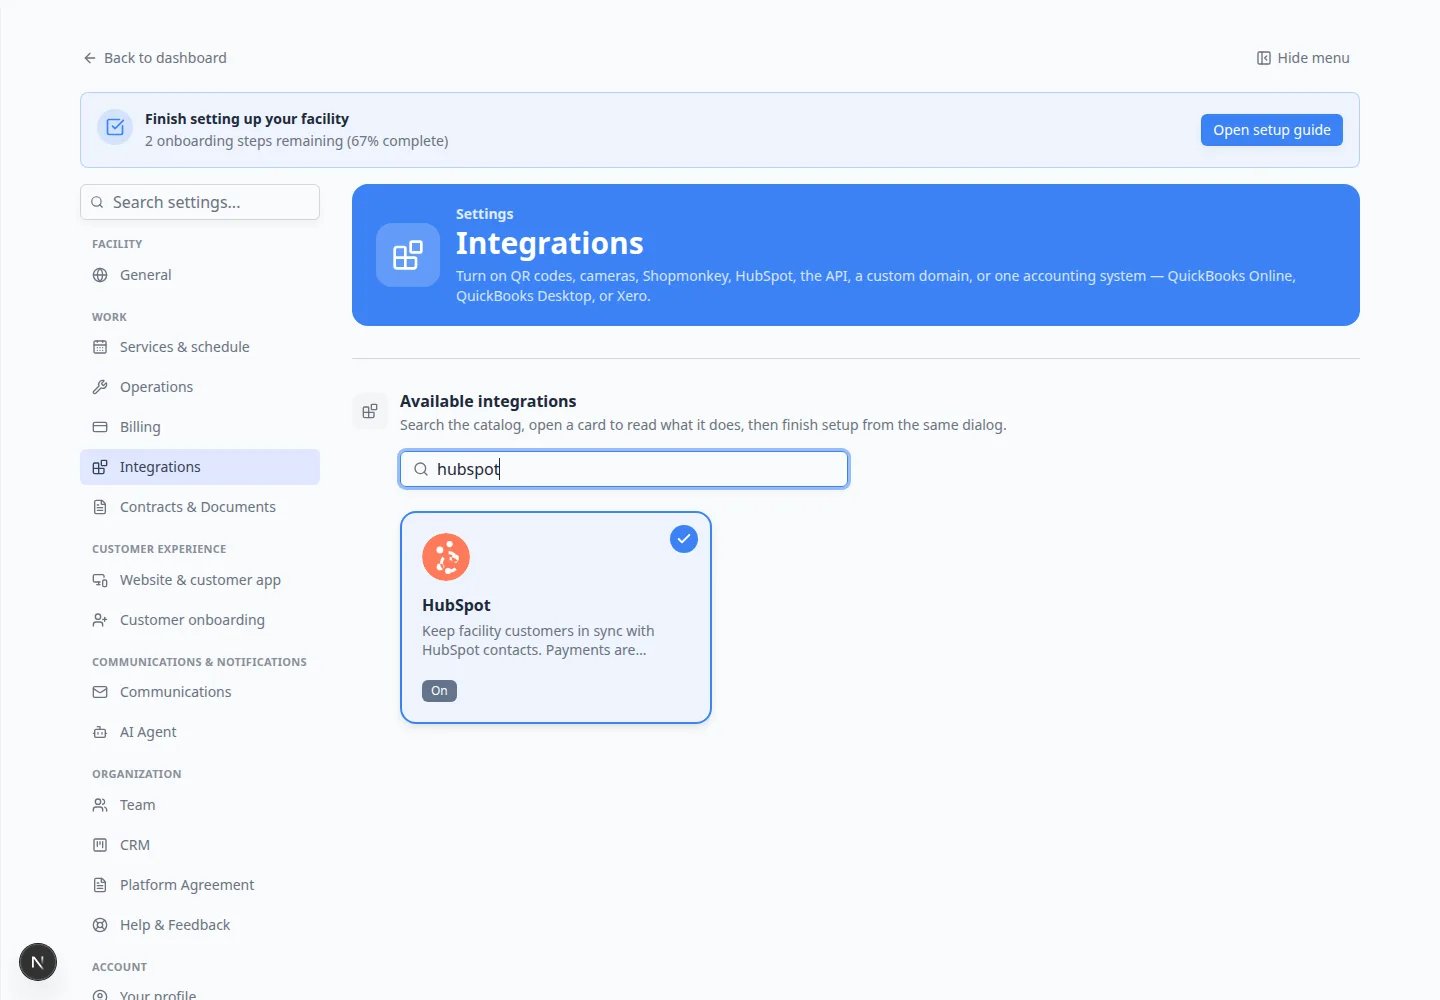 *Type a name in Search integrations... to jump to the card you need.*
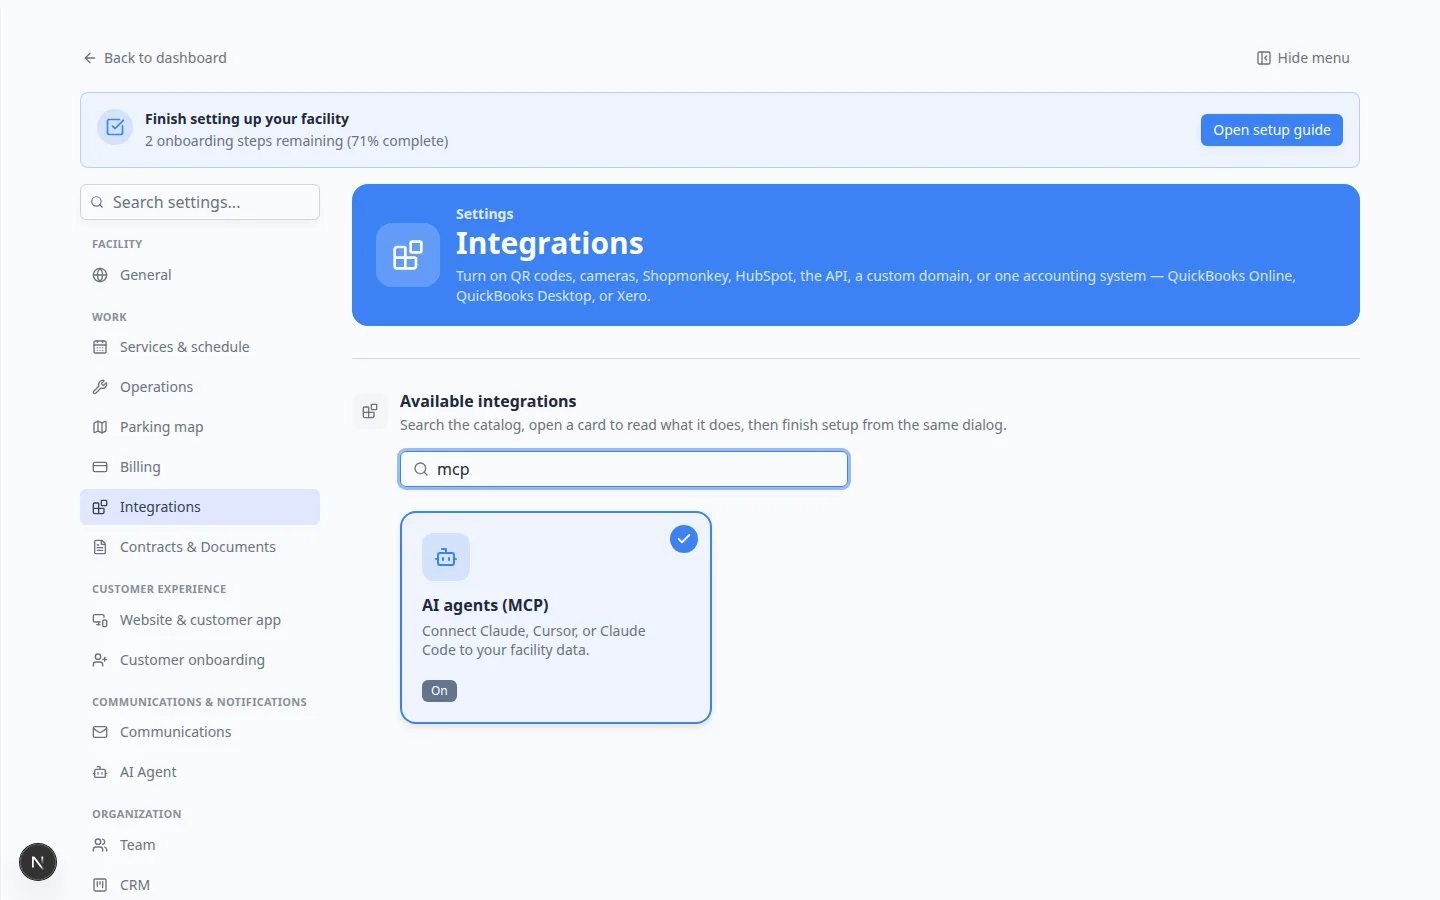 *Type **mcp** or **claude** to find **AI agents (MCP)**. That card connects Claude or Cursor. It is not the same as the **API** card.*
## Read the labels on each card
Each card has a small status label:
**Off** means the tool is listed but not turned on for your facility.
**On** means you turned the tool on. You still need to finish sign-in or create a key for tools that connect to another company.
**Connected** means the tool is on and the sign-in or key is working. For the API, **Connected** appears after you create at least one active key. For MCP, **Connected** appears after a staff member has authorized an AI client.
**Why this matters:** Turning a card **On** only makes the tool available. HubSpot still needs **Sign in with HubSpot**. Shopmonkey still needs **Connect Shopmonkey**. The API still needs a named key. MCP still needs you to paste the connector URL into Claude or Cursor and sign in.
## Open a card and finish setup
Click **HubSpot**, **Shopmonkey**, **API**, or another name. A window opens with a short explanation and a list of what the tool does.
Most cards have a switch labeled **Enable this integration**. Turn that on.
Shopmonkey is different: it shows the **API key** box in the same window. You connect with **Connect Shopmonkey** instead of a switch.
Finish the steps that appear after the tool is on. That may be **Sign in with HubSpot**, **Create API key**, **Open QR codes**, or **Enable payments**.
**QuickBooks and Xero stay dimmed until payments are on**
If you have not connected card payments yet, the QuickBooks and Xero cards show **Enable payments to turn on QuickBooks or Xero.** Click **Enable payments** to go to [Settings > Billing](https://www.carstoragesoftware.com/dashboard/settings/billing). Shopmonkey, HubSpot, QR codes, cameras, the API, and custom domain stay available without payments.
## What each group is for
**Shop management:** Shopmonkey puts shop jobs on your [Schedule](https://www.carstoragesoftware.com/dashboard/schedule).
**CRM and marketing:** HubSpot keeps sales contacts in HubSpot and storage work here.
**Operations:** QR codes and cameras help the floor team scan cars and watch gates.
**Outside helpers:** The **API** card is for a website or programmer who needs a named key. The **AI agents (MCP)** card is different: it lets Claude or Cursor look up your records after a staff sign-in. You copy a **Connector URL**—you do not paste a secret key. Each card has its own on/off switch.
**Website:** Custom domain puts customer login on an address your customers already know.
**Accounting:** QuickBooks Online, QuickBooks Desktop, or Xero — only one of these can be on at a time.
## Confirm it worked
* You can open [Settings > Integrations](https://www.carstoragesoftware.com/dashboard/settings/integrations) and see the catalog.
* Search finds the card you need.
* Opening a card shows a clear next button, such as **Sign in with HubSpot** or **Create API key**.
## Troubleshooting
**I do not see Integrations in Settings**
Ask a team admin to give you Schedule access in [Settings > Team](https://www.carstoragesoftware.com/dashboard/settings/team). Integrations uses that permission to open the page.
**The switch will not turn on**
Some cards need a different permission. HubSpot needs Customers access. The API and accounting tools need an admin or Payments access. Ask an owner to update your role.
**I clicked the wrong card**
Close the window with the **X**. Nothing is saved until you turn the switch on or click a connect button.
## What to do next
Pick the guide that matches the tool you want:
* [Connect HubSpot](/docs/settings/connect-hubspot)
* [Connect Shopmonkey](/docs/settings/connect-shopmonkey)
* [Connect the API](/docs/settings/connect-api)
* [Connect Claude or another AI helper](/docs/settings/connect-ai-agents-mcp)
* [Connect accounting integrations](/docs/settings/connect-accounting-integrations)
* [Set up printable QR codes](/docs/settings/set-up-printable-qr-codes)
* [Connect a custom domain](/docs/facility-web-pages/connect-a-custom-domain)
## Related topics
- [Connect the API](/docs/settings/connect-api.md)
- [Connect Claude or another AI helper](/docs/settings/connect-ai-agents-mcp.md)
- [Connect accounting integrations](/docs/settings/connect-accounting-integrations.md)
- [Configure the customer shop](/docs/facility-web-pages/configure-the-customer-shop.md)
- [Publish marketplace listings](/docs/facility-web-pages/publish-marketplace-listings.md)
This documentation is built and hosted on [Mintlify](https://mintlify.com), a developer documentation platform.
*Type **mcp** or **claude** to find **AI agents (MCP)**. That card connects Claude or Cursor. It is not the same as the **API** card.*
## Read the labels on each card
Each card has a small status label:
**Off** means the tool is listed but not turned on for your facility.
**On** means you turned the tool on. You still need to finish sign-in or create a key for tools that connect to another company.
**Connected** means the tool is on and the sign-in or key is working. For the API, **Connected** appears after you create at least one active key. For MCP, **Connected** appears after a staff member has authorized an AI client.
**Why this matters:** Turning a card **On** only makes the tool available. HubSpot still needs **Sign in with HubSpot**. Shopmonkey still needs **Connect Shopmonkey**. The API still needs a named key. MCP still needs you to paste the connector URL into Claude or Cursor and sign in.
## Open a card and finish setup
Click **HubSpot**, **Shopmonkey**, **API**, or another name. A window opens with a short explanation and a list of what the tool does.
Most cards have a switch labeled **Enable this integration**. Turn that on.
Shopmonkey is different: it shows the **API key** box in the same window. You connect with **Connect Shopmonkey** instead of a switch.
Finish the steps that appear after the tool is on. That may be **Sign in with HubSpot**, **Create API key**, **Open QR codes**, or **Enable payments**.
**QuickBooks and Xero stay dimmed until payments are on**
If you have not connected card payments yet, the QuickBooks and Xero cards show **Enable payments to turn on QuickBooks or Xero.** Click **Enable payments** to go to [Settings > Billing](https://www.carstoragesoftware.com/dashboard/settings/billing). Shopmonkey, HubSpot, QR codes, cameras, the API, and custom domain stay available without payments.
## What each group is for
**Shop management:** Shopmonkey puts shop jobs on your [Schedule](https://www.carstoragesoftware.com/dashboard/schedule).
**CRM and marketing:** HubSpot keeps sales contacts in HubSpot and storage work here.
**Operations:** QR codes and cameras help the floor team scan cars and watch gates.
**Outside helpers:** The **API** card is for a website or programmer who needs a named key. The **AI agents (MCP)** card is different: it lets Claude or Cursor look up your records after a staff sign-in. You copy a **Connector URL**—you do not paste a secret key. Each card has its own on/off switch.
**Website:** Custom domain puts customer login on an address your customers already know.
**Accounting:** QuickBooks Online, QuickBooks Desktop, or Xero — only one of these can be on at a time.
## Confirm it worked
* You can open [Settings > Integrations](https://www.carstoragesoftware.com/dashboard/settings/integrations) and see the catalog.
* Search finds the card you need.
* Opening a card shows a clear next button, such as **Sign in with HubSpot** or **Create API key**.
## Troubleshooting
**I do not see Integrations in Settings**
Ask a team admin to give you Schedule access in [Settings > Team](https://www.carstoragesoftware.com/dashboard/settings/team). Integrations uses that permission to open the page.
**The switch will not turn on**
Some cards need a different permission. HubSpot needs Customers access. The API and accounting tools need an admin or Payments access. Ask an owner to update your role.
**I clicked the wrong card**
Close the window with the **X**. Nothing is saved until you turn the switch on or click a connect button.
## What to do next
Pick the guide that matches the tool you want:
* [Connect HubSpot](/docs/settings/connect-hubspot)
* [Connect Shopmonkey](/docs/settings/connect-shopmonkey)
* [Connect the API](/docs/settings/connect-api)
* [Connect Claude or another AI helper](/docs/settings/connect-ai-agents-mcp)
* [Connect accounting integrations](/docs/settings/connect-accounting-integrations)
* [Set up printable QR codes](/docs/settings/set-up-printable-qr-codes)
* [Connect a custom domain](/docs/facility-web-pages/connect-a-custom-domain)
## Related topics
- [Connect the API](/docs/settings/connect-api.md)
- [Connect Claude or another AI helper](/docs/settings/connect-ai-agents-mcp.md)
- [Connect accounting integrations](/docs/settings/connect-accounting-integrations.md)
- [Configure the customer shop](/docs/facility-web-pages/configure-the-customer-shop.md)
- [Publish marketplace listings](/docs/facility-web-pages/publish-marketplace-listings.md)
This documentation is built and hosted on [Mintlify](https://mintlify.com), a developer documentation platform.