> ## Documentation Index
> Fetch the complete documentation index at: https://www.carstoragesoftware.com/docs/llms.txt
> Use this file to discover all available pages before exploring further.
# Connect HubSpot
> Keep sales and marketing in HubSpot while cars, appointments, and walkthroughs stay in Car Storage Software.
HubSpot is the place many facilities keep sales and marketing contacts. Car Storage Software is the place you keep vehicles, parking, appointments, and walkthroughs.
Connecting them means a matched person stays in both systems. You do **not** import every HubSpot contact. Newsletter names stay in HubSpot until they become a real facility customer or a teammate sends them over.
Payments are not required for HubSpot.
## What you will accomplish
* Open **HubSpot** from [Settings > Integrations](https://www.carstoragesoftware.com/dashboard/settings/integrations).
* Turn on **Enable this integration**, then click **Sign in with HubSpot**.
* Choose which HubSpot stages can create a customer here.
* Confirm a matched contact shows vehicles and the next appointment in HubSpot.
## When to connect HubSpot
Use this when your sales team already lives in HubSpot and your storage team lives here. The goal is one shared person — not two copies you have to keep in sync by hand.
Skip this if you do not use HubSpot.
## Before you start
* You need **Customers** permission to turn HubSpot on and sign in.
* You need Schedule permission to open [Settings > Integrations](https://www.carstoragesoftware.com/dashboard/settings/integrations).
* Have a HubSpot login that is allowed to connect an app.
* Know which HubSpot stages mean “this person is a real facility customer,” such as **Opportunity**, **Customer**, or **Evangelist**.
## Connect HubSpot
Go to [Settings > Integrations](https://www.carstoragesoftware.com/dashboard/settings/integrations).
If the list is long, type **hubspot** in **Search integrations...**
Click **HubSpot**. A window explains that sales stay in HubSpot and vehicles stay here.
**Expected result:** You see **Sign in with HubSpot**, **Refresh**, and a switch labeled **Enable this integration** or **Enabled**.
If the switch says **Enable this integration**, turn it on.
**Why this matters:** The sign-in button only works after HubSpot is on for this facility. Payments do not need to be on.
Click **Sign in with HubSpot**. Approve the HubSpot screens. You never paste a secret key.
**Expected result:** The HubSpot card shows **Connected**. The window shows **Connected** and, after the first sync, a last-sync time.
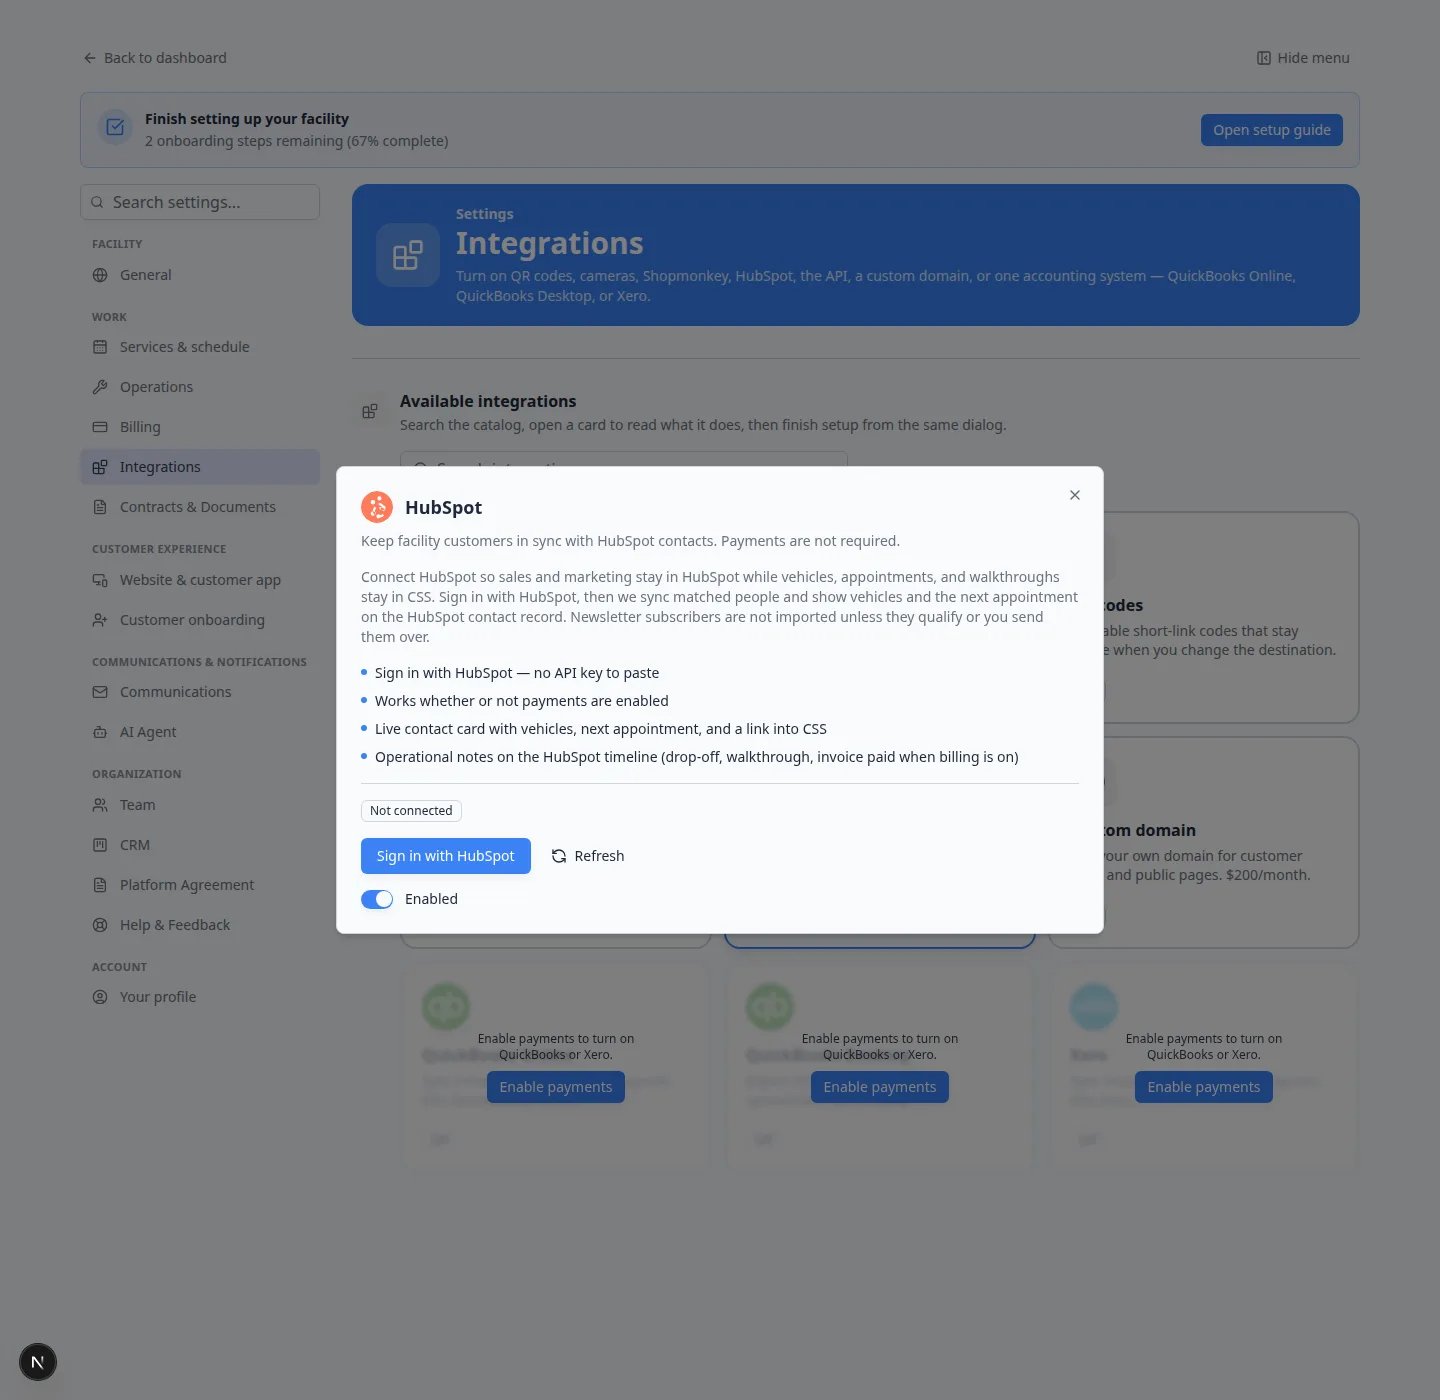 *Open HubSpot, turn on Enable this integration, then click Sign in with HubSpot. You do not paste a key.*
## Choose who becomes a customer here
After HubSpot is connected, the same window lets you pick HubSpot stages.
The default stages are **Opportunity**, **Customer**, and **Evangelist**. Keep those unless your sales team uses different names.
Click a stage name to turn it on or off. Newsletter **Subscriber** names should stay off unless you truly want them as facility customers.
If your team keeps a special HubSpot list for storage customers, choose it under **Optional inbound list**.
**Not every HubSpot contact becomes a customer**
A person is created here only when they already match someone by email or phone, they sit on an allowed stage or list, or a teammate clicks **Create in CSS** on the HubSpot contact card.
## What stays in sync
Matched people update both ways. Name, email, phone, company, relationship stage, location, and vehicle count can appear on the HubSpot contact.
Notes such as a new customer, a booked appointment, a drop-off, or a walkthrough can land on the HubSpot timeline. If billing is on, a paid invoice can add a note too.
## Confirm it worked
* The HubSpot card on [Settings > Integrations](https://www.carstoragesoftware.com/dashboard/settings/integrations) shows **Connected**.
* Editing a customer here updates the matching HubSpot contact.
* A qualifying HubSpot contact appears as a customer here, or you can create one from the HubSpot card.
## Troubleshooting
**Sign in with HubSpot is gray or missing**
Turn on **Enable this integration** first. If the button is still gray, ask Car Storage Software support to finish the HubSpot app setup for your facility. You should not need to type any secret codes yourself.
**HubSpot says this portal is already connected**
Each HubSpot account can connect to only one facility. Disconnect it from the other team, then try again.
**Too many contacts appeared here**
Remove extra stages so only **Customer** (and similar) can create records. Newsletter subscribers should stay in HubSpot.
## What to do next
If your shop also uses Shopmonkey, see [Connect Shopmonkey](/docs/settings/connect-shopmonkey). If you want invoices in QuickBooks or Xero, see [Connect accounting integrations](/docs/settings/connect-accounting-integrations).
## Related topics
- [Connect accounting integrations](/docs/settings/connect-accounting-integrations.md)
- [Browse the Integrations catalog](/docs/settings/browse-the-integrations-catalog.md)
- [Connect Shopmonkey](/docs/settings/connect-shopmonkey.md)
- [Settings overview](/docs/settings/overview.md)
- [Connect the API](/docs/settings/connect-api.md)
This documentation is built and hosted on [Mintlify](https://mintlify.com), a developer documentation platform.
*Open HubSpot, turn on Enable this integration, then click Sign in with HubSpot. You do not paste a key.*
## Choose who becomes a customer here
After HubSpot is connected, the same window lets you pick HubSpot stages.
The default stages are **Opportunity**, **Customer**, and **Evangelist**. Keep those unless your sales team uses different names.
Click a stage name to turn it on or off. Newsletter **Subscriber** names should stay off unless you truly want them as facility customers.
If your team keeps a special HubSpot list for storage customers, choose it under **Optional inbound list**.
**Not every HubSpot contact becomes a customer**
A person is created here only when they already match someone by email or phone, they sit on an allowed stage or list, or a teammate clicks **Create in CSS** on the HubSpot contact card.
## What stays in sync
Matched people update both ways. Name, email, phone, company, relationship stage, location, and vehicle count can appear on the HubSpot contact.
Notes such as a new customer, a booked appointment, a drop-off, or a walkthrough can land on the HubSpot timeline. If billing is on, a paid invoice can add a note too.
## Confirm it worked
* The HubSpot card on [Settings > Integrations](https://www.carstoragesoftware.com/dashboard/settings/integrations) shows **Connected**.
* Editing a customer here updates the matching HubSpot contact.
* A qualifying HubSpot contact appears as a customer here, or you can create one from the HubSpot card.
## Troubleshooting
**Sign in with HubSpot is gray or missing**
Turn on **Enable this integration** first. If the button is still gray, ask Car Storage Software support to finish the HubSpot app setup for your facility. You should not need to type any secret codes yourself.
**HubSpot says this portal is already connected**
Each HubSpot account can connect to only one facility. Disconnect it from the other team, then try again.
**Too many contacts appeared here**
Remove extra stages so only **Customer** (and similar) can create records. Newsletter subscribers should stay in HubSpot.
## What to do next
If your shop also uses Shopmonkey, see [Connect Shopmonkey](/docs/settings/connect-shopmonkey). If you want invoices in QuickBooks or Xero, see [Connect accounting integrations](/docs/settings/connect-accounting-integrations).
## Related topics
- [Connect accounting integrations](/docs/settings/connect-accounting-integrations.md)
- [Browse the Integrations catalog](/docs/settings/browse-the-integrations-catalog.md)
- [Connect Shopmonkey](/docs/settings/connect-shopmonkey.md)
- [Settings overview](/docs/settings/overview.md)
- [Connect the API](/docs/settings/connect-api.md)
This documentation is built and hosted on [Mintlify](https://mintlify.com), a developer documentation platform.