

What you will accomplish
- Find QuickBooks Online, QuickBooks Desktop, or Xero in the Integrations catalog.
- Understand why the cards stay locked until payments are on.
- Pick one accounting tool and finish sign-in or a file export.
When to connect the books
Connect accounting when you are ready to stop re-typing paid invoices into QuickBooks or Xero. Wait if you have not sent a real invoice yet. Set up Billing first, send a small test invoice, then come back here.Before you start
- You need Schedule permission to open Settings > Integrations.
- You need Payments permission to turn an accounting card on.
- Finish Connect payment processing so the accounting cards can be used.
- Ask your bookkeeper whether they use QuickBooks Online, QuickBooks Desktop, or Xero. You can only run one of these at a time.
If the cards are locked
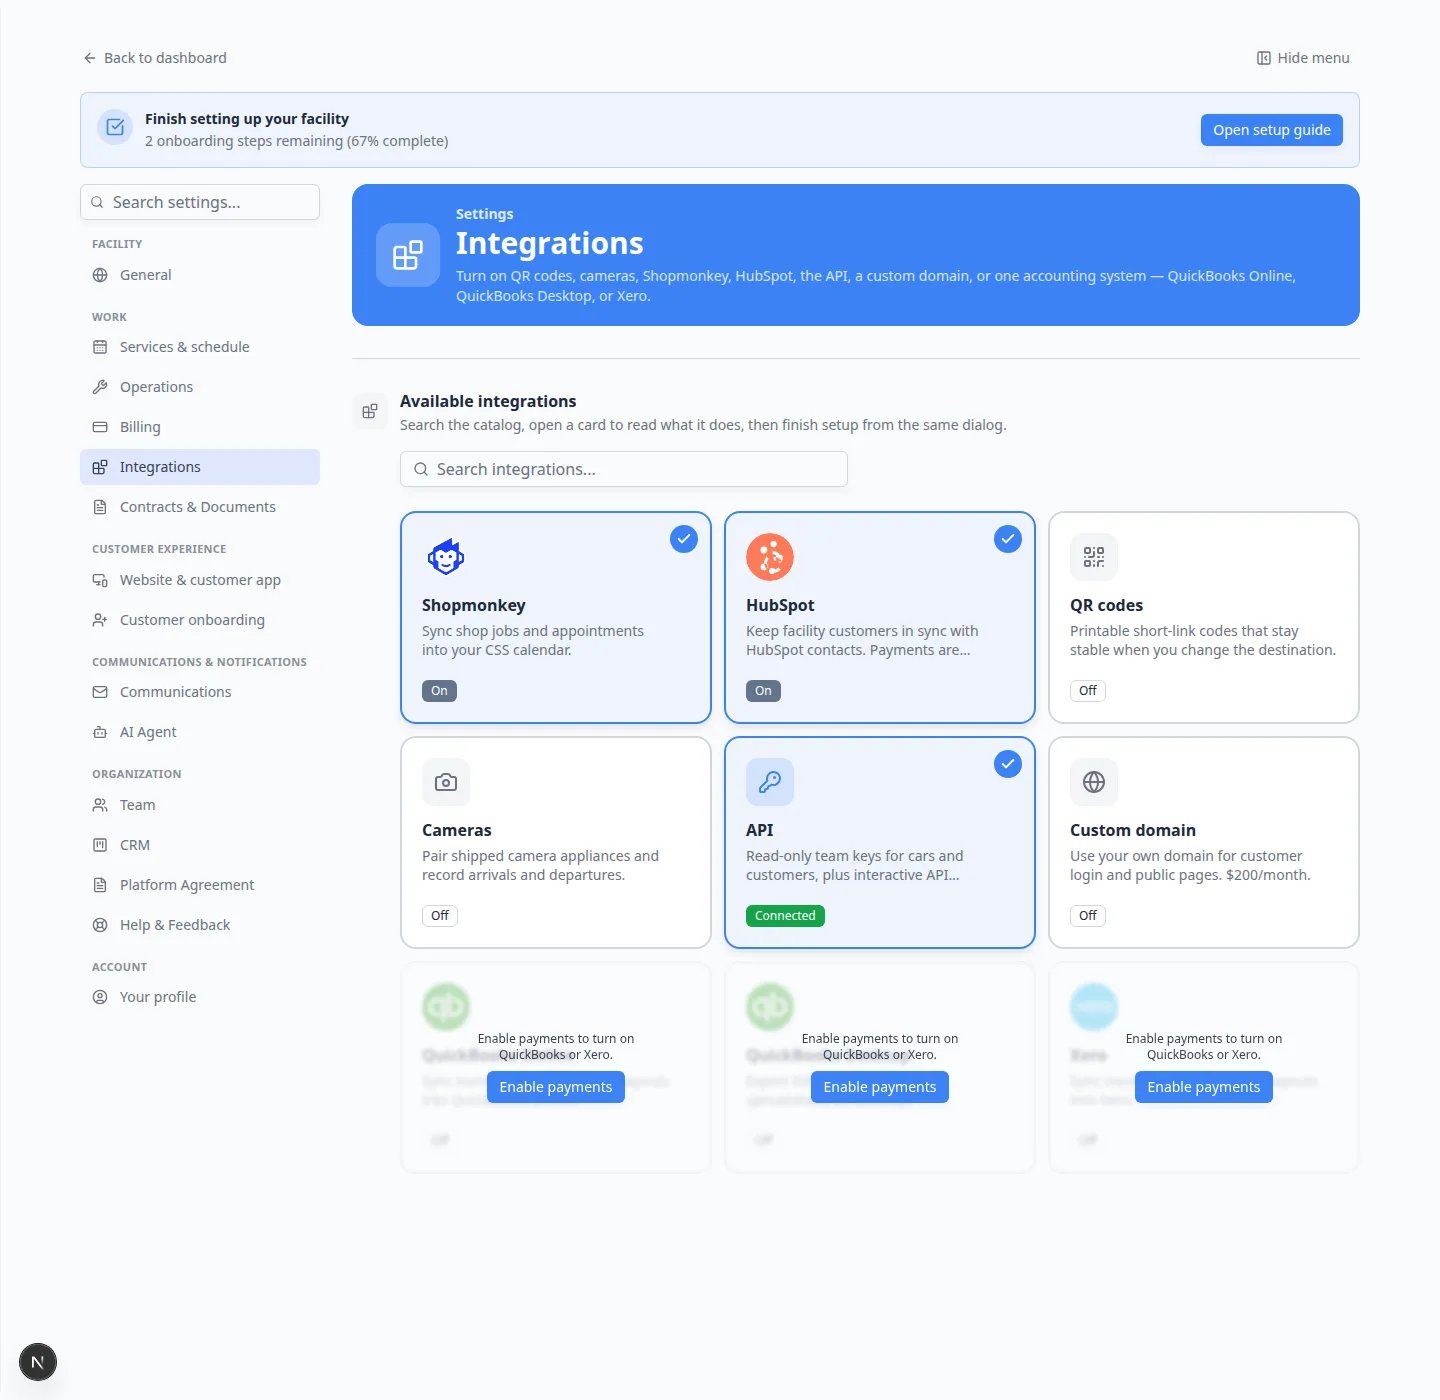
When payments are not on yet, the three accounting cards look faded. Each one says Enable payments to turn on QuickBooks or Xero. and shows an Enable payments button.1
Find the locked cards
Open Settings > Integrations and scroll to the bottom of the catalog. You should see QuickBooks Online, QuickBooks Desktop, and Xero.
2
Click Enable payments
Click Enable payments. You go to Settings > Billing.
3
Finish Stripe setup
Follow Connect payment processing. When payments are ready, return to Integrations. The overlay goes away so you can open a card.
Choose the right accounting tool
QuickBooks Online stays connected. After you sign in, new invoices and payments can post to the books on their own.Xero works the same way for facilities that already use Xero. If you have more than one Xero organisation, you pick the right one during sign-in.QuickBooks Desktop does not stay connected. You download a file for a date range and import that file in Desktop. Use this only if your bookkeeper still runs Desktop on a computer.
Connect QuickBooks Online or Xero
1
Open the card
Go to Settings > Integrations and click QuickBooks Online or Xero.
2
Turn the switch on
Turn on Enable this integration. If another accounting tool was on, this one replaces it.
3
Sign in
Use the connect button in the window and finish the QuickBooks or Xero sign-in.For Xero, confirm the organisation if more than one is listed.
4
Map accounts
After QuickBooks Online connects, choose where cash and check deposits, card payments, income, and fees should land.Why this matters: Some books use a custom undeposited-funds account. New payments follow the accounts you pick here, so your bookkeeper is not moving money later.
5
Confirm a test invoice
Create or pay a small test invoice, then ask your bookkeeper to confirm it landed the way they expect.
Export to QuickBooks Desktop
1
Enable QuickBooks Desktop
Open the QuickBooks Desktop card and turn on Enable this integration.
2
Match account names
Type the income, A/R, and undeposited-funds names exactly as they appear in the Desktop company file.
3
Download the file
Choose a date range and download the file your bookkeeper asked for. Import that file in QuickBooks Desktop.Expected result: You can download another file any time from the same window. There is no live connection to keep signed in.
Confirm it worked
- The accounting card you chose shows On or Connected.
- The other two accounting cards are off.
- A test invoice or export looks correct to your bookkeeper.
Troubleshooting
I cannot turn on QuickBooks or XeroThe cards stay locked until Stripe payments are enabled on Settings > Billing. You also need the Payments permission to flip the switch.