

/api/v1 with a team-scoped key. You turn the integration on, create a named key, pick only the scopes that tool needs, and hand the secret to the person building the integration.
Keys are not all-or-nothing. Each key can mix read and write scopes (cars, customers, contacts, locations, parking, marketing under /api/v1/marketing/* — campaigns, templates, social posts, forms, social events, assets, communications, appointments). A read-only website inventory key is still the safest default until a workflow truly needs writes.
The full list of endpoints, fields, and request bodies is autogenerated from the same Zod schemas that validate the API. Your webmaster should use the API reference (also linked from API docs in the integration window) — not a separate hand-written endpoint list.
This lives under Settings > Integrations. After it is on, the same keys also stay on Settings > Team.
What you will accomplish
- Turn on API from Settings → Integrations.
- Create a named key such as Website inventory feed.
- Choose only the scopes that tool needs (start with Read Cars / Read Customers unless writes are required).
- Copy the secret once and give it to your webmaster — not in email if you can avoid it.
When to use the API
Use this when another trusted system needs live facility data — for example a public inventory page, an insurance export, or a custom ops integration. Skip this if nobody outside Car Storage Software needs to call your records.Before you start
- You must be a team admin to turn the API on and to create or revoke keys.
- You need Schedule permission to open Settings > Integrations.
- Know what the key is for so you can name it clearly, such as Website inventory feed or Insurance export.
Turn the API on and create a key
1
Open Integrations
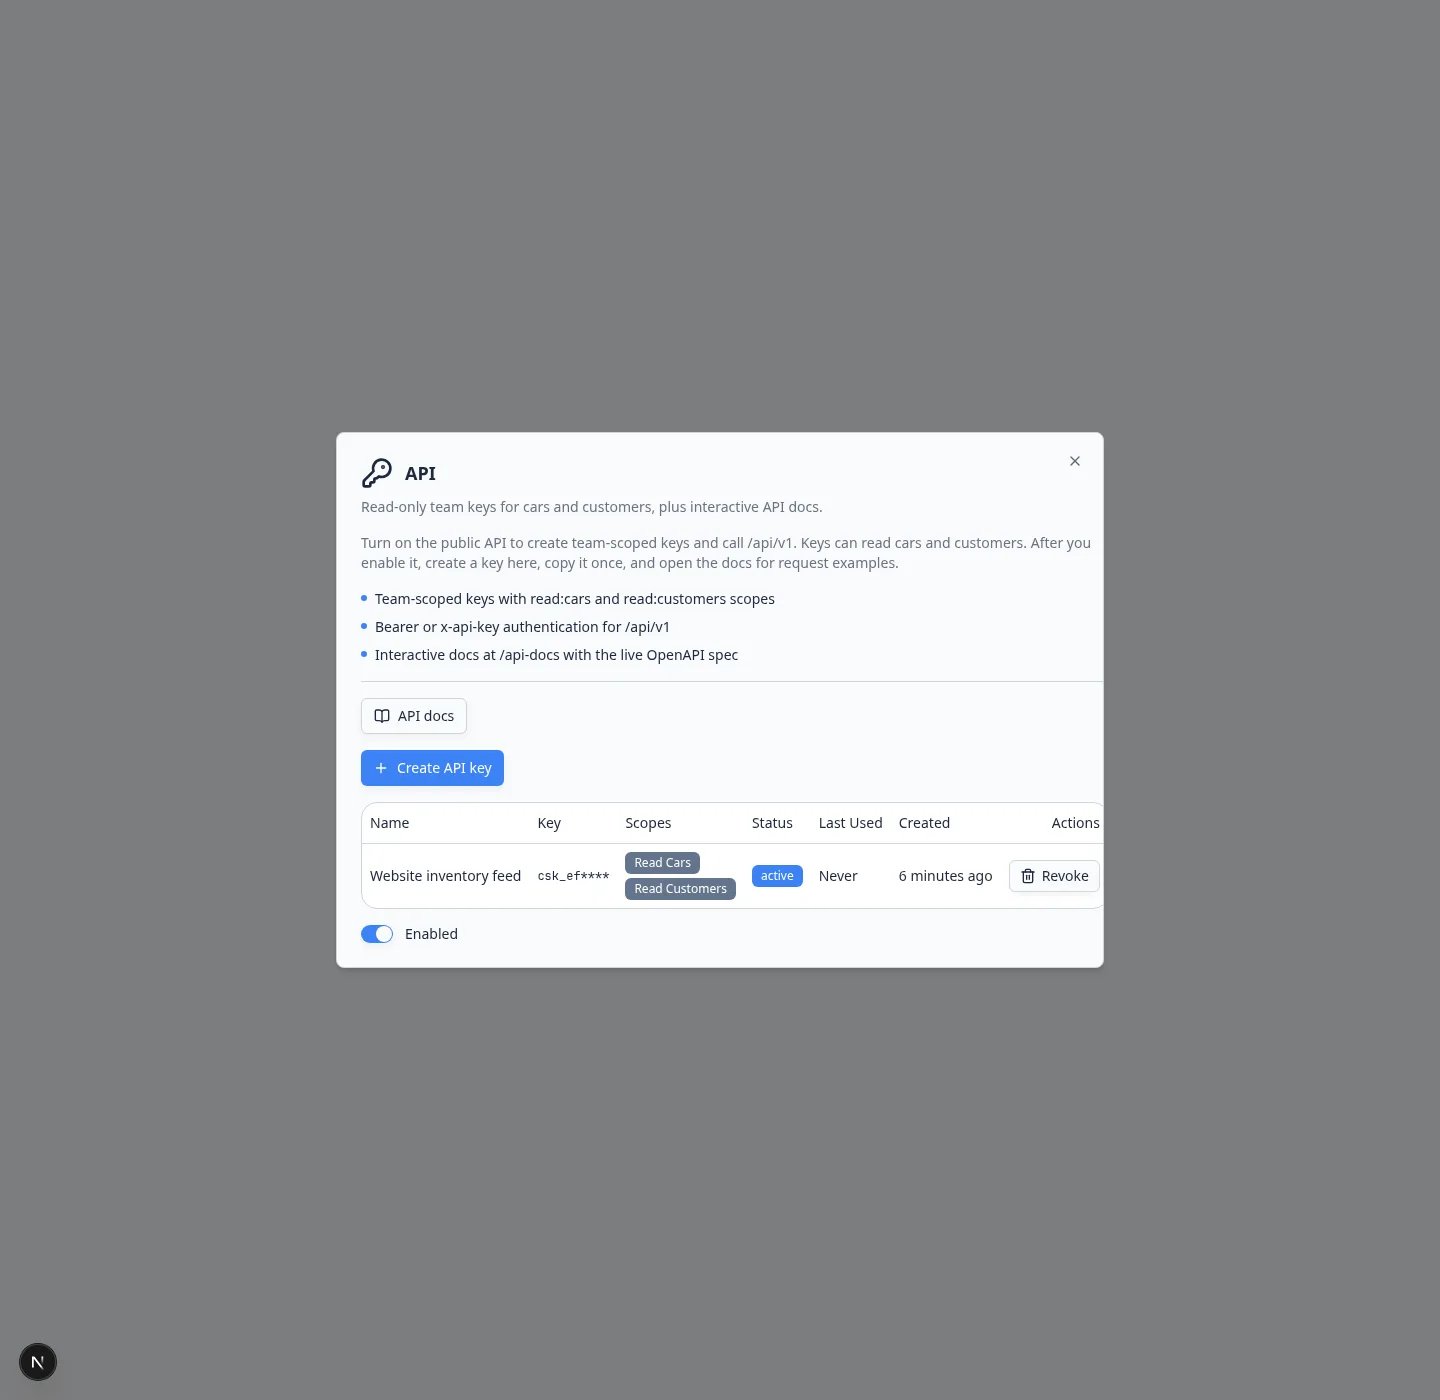
Go to Settings > Integrations and click API.
2
Turn the switch on
Turn on Enable this integration so the switch says Enabled.Expected result: The same window shows API docs, Create API key, and a table of keys.
3
Click Create API key
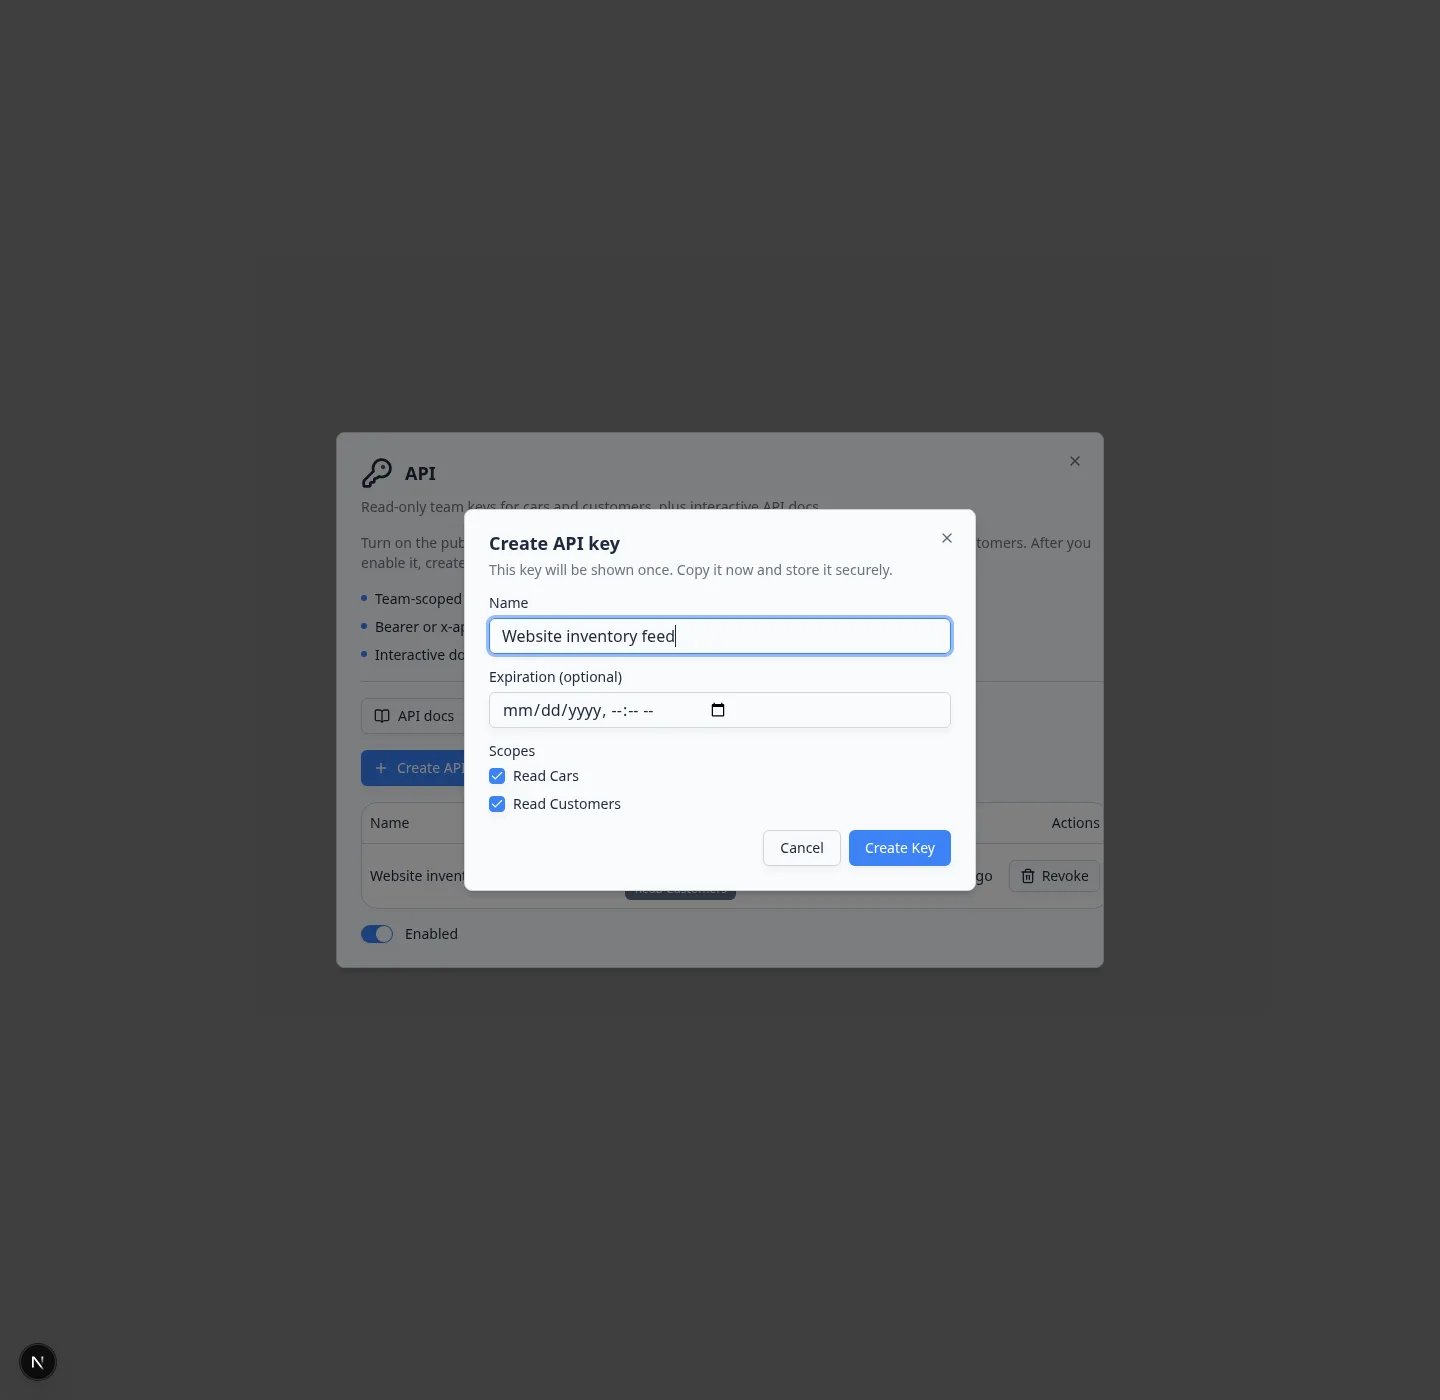
Click Create API key. A smaller window opens.
4
Name the key and choose access
In Name, type a plain label such as Website inventory feed.For a look-up-only website, leave Read Cars and Read Customers checked and leave write scopes off. Add other read or write scopes only when the tool needs them (contacts, locations, parking, campaigns, templates, forms, social events, marketing assets, communications, appointments).Expiration (optional) can stay empty unless your webmaster asked for a date.
5
Create the key and copy it
Click Create Key.Expected result: You see Copy your new API key now and a long secret. Copy it immediately. The full secret is shown only once. The table then lists the name, a short masked preview, the scopes you chose, and active.
Give the key to your webmaster
1
Hand off the secret once
Send the secret through a password tool or a private message, not a group email if you can help it.
2
Point them to the docs
In the API window, click API docs. That opens the live Swagger UI for
/api/v1 (generated from the code — paths, scopes, and body schemas stay in sync automatically). You do not need to fill it in yourself.3
Ask them to confirm
Ask your webmaster to load a test list (for example cars or customers). They should only see this facility’s records, and writes should fail unless you granted the matching
write:* scope.Confirm it worked
- The API card shows Connected.
- The keys table shows your named key as active.
- Your webmaster confirms the tool can see (and, if intended, update) only this facility’s records.
Troubleshooting
The webmaster says access is deniedIf the API card is Off, even a good key is blocked. Turn the API on again. If the key is missing the scope they need (for example Read Cars or a write scope), create a new key that includes it — existing keys keep only the scopes they were created with.